Residential Energy Delivery: Decoding the Infrastructure
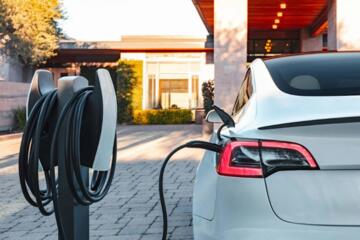
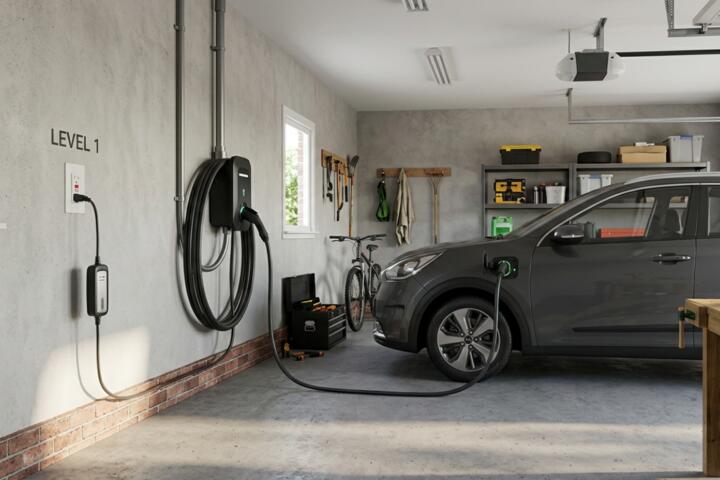
Residential charging is fundamentally about the rate of electron flow. Level 1 charging utilizes the standard 120-volt AC outlet found in every North American garage, typically restricted to 12 or 15 amps. Level 2 charging steps up to a 240-volt circuit—the same used by heavy appliances like clothes dryers or ovens—allowing for significantly higher power delivery, often ranging from 32 to 80 amps.
In practice, a Level 1 connection delivers roughly 1.4 kW of power, which translates to about 3 to 5 miles of range per hour. A robust Level 2 setup, such as a 48-amp hardwired ChargePoint Home Flex, can deliver up to 11.5 kW. This reduces a full recharge from 50+ hours down to a manageable 6 to 10 hours. According to U.S. Department of Energy data, over 80% of EV drivers charge at home, making the choice between these two levels the single most important decision for vehicle utility.
Consider a Tesla Model 3 Long Range with an 82 kWh battery. Using a standard Level 1 mobile connector, you are looking at a nearly three-day wait if you arrive home empty. With a 40-amp Level 2 station, you are fully replenished by breakfast. This isn't just about speed; it's about the "buffer"—the ability to recover from unexpected long trips in a single night.
The Hidden Friction: Common Implementation Failures
The most frequent error in home charging isn't choosing the wrong charger; it’s underestimating the existing electrical load of the home. Many DIY enthusiasts attempt to plug a high-draw Level 2 portable unit into an old dryer outlet without verifying if the circuit is rated for "continuous load." EV charging is a continuous load, meaning it pulls maximum current for hours. Under National Electrical Code (NEC) standards, you must de-rate the circuit by 20% to prevent overheating and fire hazards.
Ignoring the "vampire drain" and thermal efficiency is another pain point. Level 1 charging is inherently less efficient (roughly 75-85%) because the vehicle’s onboard systems stay "awake" longer during the slow trickle, consuming energy just to manage the battery's temperature. This leads to higher utility bills over time compared to the more efficient, rapid delivery of Level 2 (85-95% efficiency).
Finally, there is the issue of "future-proofing." Installing a 16-amp Level 2 charger might seem cost-effective today, but as battery capacities increase and vehicle-to-home (V2H) technologies emerge, that small circuit becomes a bottleneck. Homeowners often end up paying for labor twice when they realize their initial upgrade can't support their next, larger EV or a dual-EV household.
Strategic Implementation for High-Performance Charging
The 80% Rule and Circuit Selection
When planning a Level 2 installation, always apply the 80% rule for continuous duty. If you want to charge at 40 amps, you must install a 50-amp breaker and use 6 AWG copper wiring. Utilizing a high-quality brand like Wallbox Pulsar Plus allows you to adjust the amperage via software, providing flexibility if your main panel has limited headroom.
Load Management and Smart Panels
If your electrical panel is maxed out at 100 or 150 amps, you don't necessarily need a $5,000 service upgrade. Systems like the Lumin Smart Panel or Emporia Vue can perform "load shedding." They monitor your home's total usage and temporarily pause the EV charger if the AC and electric oven kick in simultaneously. This allows for high-speed Level 2 charging without risking a main breaker trip.
Hardwiring vs. NEMA 14-50 Plugs
While a NEMA 14-50 plug offers portability, hardwiring your station is the gold standard for reliability and speed. Hardwired units can often reach 48 or 50 amps (requiring a 60-amp circuit), whereas plug-in units are limited to 40 amps by code. Furthermore, hardwiring eliminates a common failure point: the outlet itself. High-draw cycles can cause industrial-grade outlets like Hubbell or Bryant to degrade over years; hardwiring bypasses this entirely.
Optimizing for Time-of-Use (TOU) Rates
In states like California or New York, electricity can cost three times more during peak evening hours. Use chargers with integrated WiFi—such as the JuiceBox 40—to schedule charging for "super off-peak" windows (usually 12 AM to 6 AM). This automation can save a heavy commuter over $600 annually compared to "dumb" Level 1 charging that starts the moment you plug in.
Managing Outdoor Installations
If your charger is exposed to the elements, the NEMA rating is critical. Ensure your station is NEMA 4 rated, not just NEMA 3R. The Grizzl-E Classic is a favorite among experts for its heavy-duty aluminum cast housing, which survives extreme cold and direct rain better than plastic alternatives. Always use liquid-tight conduit for the final run to the station to prevent moisture ingress.
Future-Proofing for Bi-Directional Power
The industry is moving toward Vehicle-to-Home (V2H) capabilities. While currently limited to specific vehicles like the Ford F-150 Lightning (using the Ford Charge Station Pro), installing a larger 1-inch or 1.25-inch conduit now will make it much easier to pull the thicker communication and power wires required for these systems later.
Real-World Deployment Scenarios
Case Study 1: The Suburban Multi-EV Household A family in Chicago with a Ford Mustang Mach-E and a Rivian R1S found that Level 1 charging was impossible. They shared a single 120V outlet, resulting in "range anxiety" every Monday morning. They hired a certified Qmerit installer to put in a 100-amp sub-panel in the garage and two Tesla Universal Wall Connectors. By using "Power Sharing," the two chargers communicate; when both cars are plugged in, they split the 48-amp output. When one finishes, the other gets the full power. Total cost: $2,800. Result: Both vehicles are 100% ready every morning, and the household avoided a $4,000 main service upgrade.
Case Study 2: The Urban Condo Retrofit An EV owner in a 1970s condo building was told Level 2 was impossible due to limited capacity in the common garage. By installing a DCC (Demand Charge Controller), the charger was tapped into the owner's existing meter. The DCC monitors the condo’s total power consumption and only allows the charger to run when the unit's consumption is below 80%. This allowed for a 30-amp Level 2 install without impacting the building’s infrastructure. Result: Charging speed increased 5x, and the property value of the condo increased by an estimated 3-5%.
Comparison of Residential Charging Tiers
| Feature | Level 1 (Standard) | Level 2 (High-Output) |
|---|---|---|
| Voltage | 120V AC | 208V - 240V AC |
| Amperage Range | 12A - 16A | 16A - 80A (40A-48A Typical) |
| Miles per Hour | ~4 miles | ~25 to 50 miles |
| Installation Cost | $0 (Uses existing outlet) | $500 - $2,500+ |
| Primary Hardware | Mobile Connector / OEM Cord | Wall-mounted EVSE (e.g., Tesla, ChargePoint) |
| Efficiency | Low (due to overhead) | High (faster delivery) |
Navigating Installation Pitfalls
A frequent mistake is using a "cheap" NEMA 14-50 outlet intended for a stove. Residential-grade outlets from big-box stores are not designed for 10 hours of continuous high-heat load. They can melt. Always insist on an industrial-grade receptacle or, better yet, a hardwired connection.
Another oversight is forgetting the permit and inspection process. Many homeowners skip this to save $150, but if an unpermitted charger causes an electrical fire, insurance companies may deny the claim. Furthermore, a permit is often required to qualify for federal tax credits (like the 30% 30C credit in the US) or local utility rebates that can cover up to 100% of the hardware costs.
Lastly, do not ignore the Wi-Fi signal in your garage. Modern "Smart" chargers require a connection for firmware updates and scheduling. If your router is on the other side of the house, consider a powerline adapter or a Wi-Fi extender like TP-Link Deco before the electrician finishes the job.
Frequently Asked Questions
Can I use an extension cord for Level 1 charging? Generally, no. Most manufacturers and fire marshals strictly advise against it. If you must, it requires a heavy-duty 10-gauge or 12-gauge "Contractor Grade" cord. Undersized cords will drop voltage, generate heat, and potentially melt your vehicle's charging port.
Does Level 2 charging degrade the battery faster than Level 1? No. In fact, Level 2 is often considered the "sweet spot" for battery health. It provides enough current to efficiently manage thermal systems without the extreme heat generated by Level 3 DC Fast Charging. Research shows minimal difference in long-term degradation between Level 1 and Level 2 users.
What is the average cost for a professional Level 2 installation? If your electrical panel is in the garage, expect to pay $500–$800 for labor and materials, plus the cost of the charger ($400–$700). If your panel is on the opposite side of the house or requires a service upgrade, costs can climb to $2,000–$4,000.
Can I charge a non-Tesla vehicle on a Tesla Wall Connector? Yes, with the Tesla Universal Wall Connector, which includes an integrated "Magic Dock" adapter for J1772 vehicles. Alternatively, you can buy an adapter like the Lectron J1772 to Tesla to mix and match brands.
Do I need a 50-amp or 60-amp circuit? A 50-amp circuit allows for 40-amp charging (9.6 kW), which is plenty for almost everyone. A 60-amp circuit allows for 48-amp charging (11.5 kW). Only choose 60-amp if your vehicle can actually accept that rate and you have a high daily mileage requirement.
Author’s Insight
In my years consulting on residential energy projects, I’ve found that homeowners rarely regret "overbuilding" their charging setup, but they almost always regret underbuilding it. Even if your current EV only draws 32 amps, I always recommend pulling wire rated for 60 amps. The incremental cost of thicker copper is negligible compared to the labor of ripping out drywall a second time three years from now. My best advice: hardwire your station. It’s safer, faster, and eliminates the GFCI "nuisance tripping" that often plagues plug-in installations.
Conclusion
Selecting between Level 1 and Level 2 charging depends on your daily mileage and your home's electrical capacity. While Level 1 is a viable "emergency" stopgap for low-mileage drivers, Level 2 is the essential foundation for a seamless electric vehicle experience. By prioritizing high-quality components, adhering to the 80% load rule, and utilizing smart scheduling to lower costs, you can turn your home into a high-efficiency refueling hub. Focus on hardwired solutions and professional assessments to ensure your infrastructure remains safe and capable for the next decade of automotive evolution.