Roof Rails And Real Limits
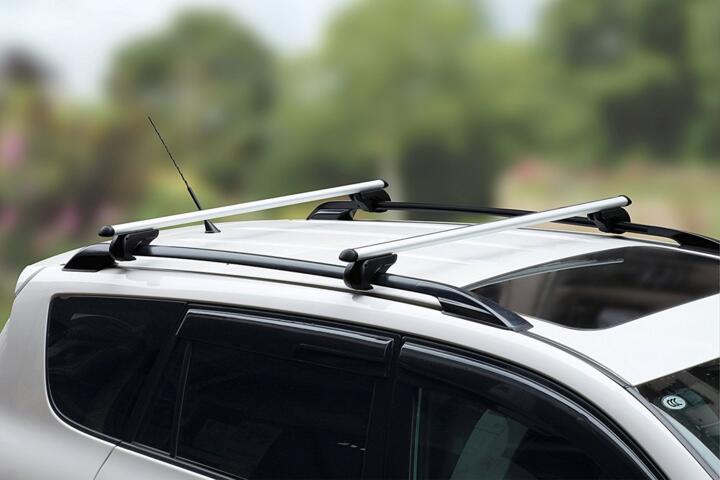
Roof rails are the anchor points for racks, boxes, and ladders, but the vehicle roof has its own maximum load. Many buyers focus on the rack’s number and miss the roof’s number, which can be lower. A typical crossbar system may list a dynamic load rating around 100 lb (45 kg), while the vehicle’s roof limit can be 75 lb (34 kg) or less. The difference matters because wind and road impacts create dynamic forces that exceed static weight.
Skip the “it feels solid” test. It hides the real failure mode: bending or loosening at the rail mounting points. For example, a 150 lb (68 kg) cargo box can generate several times that load at speed when the suspension hits bumps, especially with a tall box. Roof rails also change airflow, which can increase lift on a poorly fitted fairing or box.
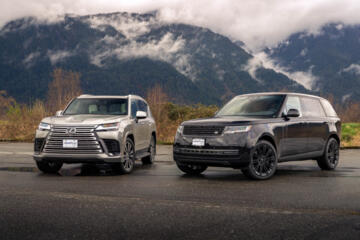
Vehicle type changes the numbers. A midsize SUV often has a different roof structure and mounting design than a sedan, and the manufacturer sets a roof limit for that specific body. Even within one model line, factory roof rails and dealer add-ons can carry different ratings. In fleet work, the paperwork matters because insurers and service departments ask for the exact load spec when damage shows up.
Industry guidance is consistent: manufacturers rate loads with defined test conditions, not “maximum you can get away with.” Many rack makers reference dynamic testing and a safety factor, but the vehicle owner’s manual remains the controlling document. If your manual says 150 lb total roof load, that number includes rails, crossbars, and cargo. If it says 75 lb, a rack rated higher does not override it.
What People Get Wrong
People often treat roof rails like they are rated to the same limit as the rack. That mistake shows up when the rack’s label says 165 lb, but the vehicle manual caps roof load at 100 lb. The consequence is not just a loose rack; it can be cracked roof sheet metal, damaged mounting brackets, or water intrusion at the rail seals. Once water gets into the roof structure, corrosion can start quietly.
Skip the “stack the ratings” habit. It fails because the lowest rating wins under real forces. A common real-world situation is a family road trip with a cargo box plus two bike racks. The box might be 60 lb, each bike rack might be 25 lb, and the bikes add 40–50 lb each. Add crossbars, and you can exceed a 100 lb roof limit without noticing.
Another pain point is crossbar spacing and mount geometry. A mount that clamps too close to the rail end can concentrate stress, and a mount that sits too far forward can increase front-axle lift on certain vehicles. Ladder racks also create a high center of gravity, which increases sway and load transfer when you hit crosswinds or uneven pavement.
Financial consequences show up later. A rail replacement can cost hundreds of dollars in parts and labor, and roof repairs often require paint blending. If the roof liner or headliner needs removal, labor time rises. Resale value can drop too, because buyers notice mismatched paint or evidence of prior roof work.
How To Read Ratings And Fit Correctly
Start With The Owner Manual
Check the vehicle owner’s manual for the maximum roof load in pounds or kilograms. This limit usually covers the entire system: rails, crossbars, and cargo. It may also specify a maximum for “roof rack” versus “roof-mounted accessories.” If your manual lists 75 lb (34 kg), treat that as the ceiling even if the rack kit label says 100 lb or 150 lb.
Use the manual number in your packing math. For a 2019 Toyota RAV4, for instance, the roof load limit is listed in the manual and varies by configuration; the same model year can differ by trim and roof rail type. If you cannot find the number, contact the dealer with your VIN and ask for the exact spec. That step prevents buying a rack that looks compatible but violates the vehicle’s limit.
Separate Static Weight From Dynamic Forces
Dynamic load is why a “light” cargo can still cause damage. Wind gusts and potholes add impact forces that the manufacturer accounts for in testing. A roof box that weighs 80 lb (36 kg) can impose higher bending stress on rails during repeated hits. That is why many ratings are conservative and why exceeding them accelerates fatigue.
Skip the “I drove 2,000 miles like this” argument. Fatigue damage accumulates, and the first visible symptom might be a loosened clamp after 6–12 months. If you hear new creaks over rough roads, stop and re-check torque and fit. A torque wrench reading that drifts can point to a clamp that is not seating correctly.
Match Rail Type And Mounting Points
Factory rails and aftermarket rails can have different mounting hardware and different load paths. A roof rail kit that fits the feet pattern does not guarantee it matches the vehicle’s designed load rating. Look for a kit that states compatibility by model, year, and roof rail type. If the kit is “universal,” the risk rises because clamp placement and contact area vary.
For example, a 2022 Ford F-150 with factory bed-to-roof tie-down options is not the same as a roof rail system designed for the cab roof. The cab roof structure and mounting points differ, and the manual roof limit still governs. If you are mounting a ladder rack, confirm the kit’s stated roof load and the ladder rack’s own rating for the same vehicle.
Verify Crossbar Spread And Clearance
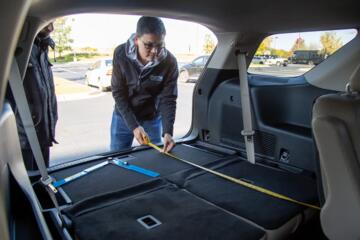
Crossbar spacing affects how the rack distributes load across the rails. Bike racks and cargo boxes often specify a minimum and maximum crossbar spread. If your bars are too close, the box base can flex; too far, and the box may not clamp evenly. Measure the distance between crossbar centers with a tape measure, then compare to the rack instructions.
On a 2021 Honda CR-V, crossbar placement can change depending on whether you use factory rails or a different rail footprint. The box manufacturer’s template matters more than the “it fits” feeling. If the box overhangs the rails excessively, wind load increases and the clamp sees higher leverage. That is the kind of detail that shows up in warranty disputes.
Use Correct Torque And Recheck After Miles
Most clamp and rail fasteners require a specific torque value, often listed in the rack instructions. Use a torque wrench, not a guess. After installation, re-check fasteners after the first 50–100 miles (80–160 km), then again after a few trips. Many people skip the re-check, and that is where rails start to shift.
Skip the “tight enough” approach. It fails because clamp friction depends on correct seating and torque, and over-torque can damage threads or crush seals. If you see a gap between the rail foot and the roof, stop and re-seat the hardware. A small aside from shop practice: I’ve seen clamp pads wear unevenly when the rail foot is slightly canted, which then reduces friction over time.
Account For Cargo Weight And Center Of Gravity
Count every item: cargo box weight, bike rack weight, bikes, and any accessories. Then add the weight of the mounting hardware if the manual counts it. For tall loads, treat the roof as a lever. Higher center of gravity increases sway, which increases peak forces on the rails during cornering and lane changes.
For a family using a roof box on a 2020 Subaru Outback, a common setup is a 70 lb (32 kg) empty box plus 2–3 bags at 40–60 lb total. Add a 25 lb bike rack and two 35 lb bikes, and you can exceed 100 lb quickly. If your roof limit is 150 lb, you still need to check how much of that is already consumed by the box and racks.
Plan For Water Seals And Roof Damage Risk
Rail installation can create leak paths if seals are misaligned or if fasteners are missing. After installation, inspect around each rail foot for proper seating and check for water intrusion during a car wash or rain. If your vehicle has a panoramic roof, confirm clearance so the rail hardware does not interfere with roof drains or seals. Misplaced hardware can also scratch paint, which then rusts at the edges.
Skip the “install once and forget” mindset. It fails because vibration loosens clamps and because roof sealants age. If you notice rust around rail feet, address it early. A shop can remove the rail, clean the contact area, and re-seal, but the labor cost is usually higher than careful installation.
Confirm Towing, Payload, And Roof Limits Separately
Roof rails do not change payload or towing limits. A pickup with a 1,500 lb payload rating can still have a roof limit that is far lower, and the roof load does not count toward payload in the same way. The vehicle’s payload and GVWR limits govern how much weight you can carry in the cabin and bed. Roof load governs the roof structure and mounting points.
For example, a 2023 Ram 1500 may have a high payload, but the roof load limit for rails and cargo is still set by the roof structure. If you overload the roof, you can create roof damage even when the truck is under GVWR. That is why a correct spreadsheet helps: list roof items, cabin items, and bed items separately, then compare each to the manual limits.
Mini Case Studies For Real Use
A small delivery company ran a 2020 Nissan Rogue with roof rails and a cargo box for weekend routes. They started with a box rated for 165 lb, but the owner’s manual roof limit was 100 lb. After 9 months and roughly 18,000 miles, they found loosened clamps and a hairline crack near one rail foot. They replaced the rail assembly and reinstalled with a lower-capacity box and a stricter packing limit, cutting future clamp re-checks to every 3 months instead of monthly. Their repair bill was about $1,200 in parts and labor, plus downtime for a day.
Skip the “we were under the rack rating” conclusion. It misses the vehicle roof limit that controls the mounting stress. In a second case, a trades contractor used a 2018 Ford Transit Connect with a ladder rack and two tool cases. The rack kit was rated higher than the vehicle roof limit, and the contractor exceeded the roof cap by about 25 lb during peak jobs. After 6 months, they saw water staining inside the headliner near the rail foot. They resealed and replaced one rail foot gasket, then switched to a lighter ladder and redistributed tools into the cargo area. The reseal and gasket work cost about $450, and they avoided a larger roof repair.
Roof Rail Checklist And Table
| Check | What To Look For | Why It Matters | Quick Pass/Fail |
|---|---|---|---|
| Vehicle Roof Limit | Manual number in lb/kg | Lowest rating controls mounting stress | Cargo total ≤ roof limit |
| Rack And Box Ratings | Dynamic vs static language | Dynamic forces exceed static weight | Rack rating ≥ roof limit |
| Crossbar Spread | Min/max spacing spec | Affects clamp load distribution | Measured spacing matches spec |
| Torque And Recheck | Torque value and schedule | Prevents loosening and seal leaks | Recheck after 50–100 miles |
| Water Seals | Proper foot seating | Prevents corrosion and staining | No gaps after install |
Common Mistakes And Fixes
Buying a rack kit first causes the wrong math. It happens because the rack box shows a high number, and the vehicle manual number gets overlooked. The impact is rail stress, clamp loosening, and roof seal problems. Avoid it by writing down the vehicle roof limit, then subtracting the weight of the box and racks before adding cargo.
Skip the “install once” routine. It happens because people assume factory rails never shift. The impact is gradual loosening from vibration, which can turn into a crack at a rail foot. Avoid it by using a torque wrench and re-checking after 50–100 miles, then before long trips. I keep a small note in my glovebox with the torque spec and the date of the last re-check, version 2.1 of my checklist from 2024.
Overloading the roof for convenience is another pattern. It happens during moving days when the cabin and trunk fill up. The impact is higher wind noise, more sway, and higher bending stress on the rails. Avoid it by redistributing weight into the cabin or cargo area and keeping the roof load under the manual limit. If you need more capacity, a trailer often costs less than repeated roof repairs.
Ignoring crossbar spacing causes uneven clamp pressure. It happens when someone swaps crossbars between vehicles or uses a “universal” adapter. The impact is box flex and faster wear on clamp pads. Avoid it by measuring crossbar center distance and matching the box or bike rack instructions. If the instructions list a specific spread range, treat it as a hard constraint.
FAQ
Do Roof Rails Have A Separate Limit?
Roof rails can carry a rating, but the vehicle owner’s manual usually sets the controlling roof load for that specific body and rail mounting design. A rack kit may list a maximum load, yet the vehicle roof limit can be lower. The safest approach is to treat the lowest number as the ceiling for the entire roof system: rails, crossbars, and cargo. If your manual lists a roof load in kg and also mentions a separate limit for “roof rack,” use the more restrictive value.
How Do I Weigh A Roof Box Setup?
Start with the box’s listed weight and the rack’s weight, then add the cargo weight. Many cargo boxes list a “max load” but not the empty weight in the same place, so check the spec sheet. For bikes, count the bike weight plus the bike rack’s weight, then add any accessories like locks or fairings. If your roof limit is 100 lb, a 70 lb empty box plus 2 bikes at 35 lb each already exceeds it. That math prevents surprises on the first long trip.
What Happens If I Exceed The Roof Limit?
Exceeding the roof limit increases bending stress at the rail feet and clamp points. Over time, that can cause loosening, seal failure, and corrosion where water enters. The failure can be gradual, such as a rack that shifts after repeated bumps, or sudden, such as a cracked rail bracket. You may also see increased wind noise and vibration. If you suspect overloading, stop using the setup and inspect rail feet, clamp pads, and roof seals.
Can I Use Aftermarket Rails With Factory Racks?
Compatibility depends on the rail footprint, crossbar type, and the mounting system. A factory rack designed for one rail style may not clamp correctly on a different rail profile. The instructions for the rack typically list which rail types and crossbar spreads it supports. Even if the parts physically fit, the vehicle roof limit still governs. If the kit documentation does not specify your model year and roof rail type, treat it as a higher-risk fit.
Do Roof Rails Affect Fuel Economy?
They can. Roof rails and crossbars change airflow, and a cargo box increases aerodynamic drag. Fuel economy drops vary by vehicle shape and speed, but the effect is usually more noticeable on highway driving than city driving. If you track fuel economy, compare trips with and without the box under similar routes and tire pressures. A practical check is to note your average mpg over 300–500 miles, then repeat with the same load configuration. That helps separate seasonal temperature effects from aerodynamic drag.
Author's Insight
Roof rail ratings read like a simple number, but the controlling limit is the vehicle roof load from the owner’s manual. The rack label can be higher, yet the rail mounting points still see the vehicle’s maximum stress. In practice, most problems show up after repeated vibration: clamps loosen, seals age, and corrosion begins at rail feet. A careful installation with correct torque and a re-check after 50–100 miles prevents many of the issues that lead to expensive roof repairs.
Also, roof setups change the vehicle’s behavior. Wind noise and sway increase with higher, wider loads, and that can make long trips feel harsher even when the suspension is unchanged. If you carry bikes or a tall ladder, plan for crosswinds and uneven pavement, then keep the roof load under the manual cap.
Key Takeaways
Use the vehicle owner’s manual roof limit as the ceiling, then add up rails, crossbars, racks, and cargo weights. Match crossbar spacing to the rack or box instructions, and install with a torque wrench. Recheck fasteners after 50–100 miles, then inspect rail feet and seals before long trips. If you see rust, water staining, or shifting hardware, stop using the setup and have the mounting inspected.
Benefits show up as fewer clamp adjustments, less roof seal wear, and better long-trip stability. Limits remain real: roof load does not replace payload or towing limits, and aerodynamic drag can reduce fuel economy. If you are unsure about your vehicle’s roof limit or your rail kit’s compatibility, ask a dealer service department for the exact spec tied to your VIN, then confirm with the rack manufacturer’s installation guide.