Three Seats: The Real Math
Three-across installs depend on seat width, belt geometry, and how the vehicle’s lower anchors sit relative to each seating position. A typical forward-facing convertible seat is often around 17–19 inches wide at the widest point, so three seats can exceed many sedans’ usable back-row width. That is why vehicle type matters more than many buyers realize.
Rear-seat shoulder room is a better starting point than overall interior width. For example, the U.S. NHTSA notes that child restraint fit and installation vary widely by vehicle and seat model, even when both are “approved.” In practice, you also run into latch/anchor spacing limits and belt-buckle placement that can block a tight belt path.
Skip the assumption that “three seats” means “three seats that fit.” They often fit on paper, then fail during the belt-tightening step. Skip the assumption that “all seats are the same width.” They are not, and the difference shows up at the buckle and armrest areas.
Real-world measurements help. Many vehicles have two outboard seating positions with head restraints and a center position with a different belt type, sometimes a lap-only belt or a belt with a different retractor behavior. If your center belt is lap-only, three-across becomes much harder for forward-facing seats, and rear-facing installs may require a different seat design.
Vehicle type changes the problem. A minivan often has more usable back-row width and flatter seat cushions than a compact SUV, while some sedans narrow quickly toward the center. That narrowing can force the middle seat to sit too upright or too far forward, which affects recline and head support.
Why Three-Across Fails
People get stuck on the purchase decision and skip the install test. They buy three seats that “fit” in a showroom photo, then discover the center belt buckle sits where the child seat base wants to lock. The result is a base that cannot reach the correct recline angle, or a belt path that twists.
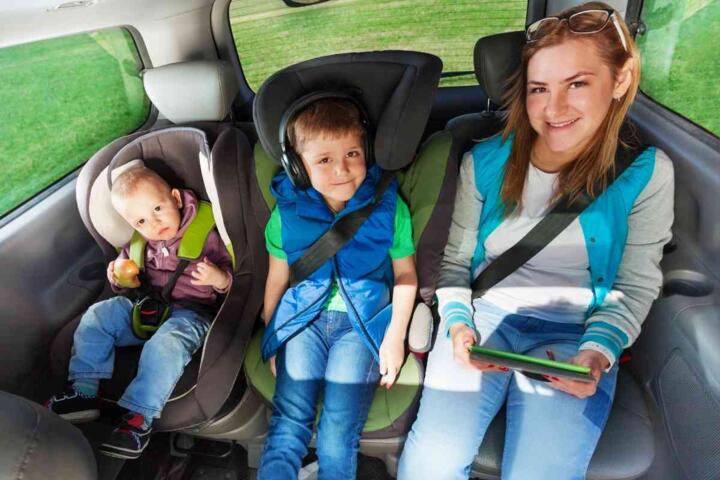
Another common mistake is mixing seat types without checking compatibility. A rear-facing convertible, a forward-facing harness seat, and a booster can each demand different belt routing and different clearance around the headrest. When one seat forces the next seat’s headrest to move, the whole row can lose safe head support.
Consequences show up fast. A loose install can exceed the allowed movement at the belt path, and a twisted belt can reduce restraint performance in a crash. The financial consequence is also real: rebuys happen when a seat cannot be installed tightly enough, or when a second seat choice blocks the first.
Real-world situations are predictable. A family leaves for a 45-minute school run, then one child’s seat shifts after the first week because the belt routing was marginal. A daycare pickup becomes a daily wrestling match, and the install gets “good enough” until it is not.
Skip the idea that “the manual will cover every car.” It rarely covers your exact buckle position, seat-track interference, or headrest shape. Skip the assumption that center seats are always equivalent. They are not, and the center belt often behaves differently than the outboard belts.
Specific Fixes For Three Seats
Measure Seat Width And Space
Start with the child seats’ published dimensions, then compare them to the vehicle’s usable back-row width at the seat cushion and at the belt path height. Many manufacturers publish “overall width” and “base width,” and those numbers matter more than the label size. Use a tape measure and note where the seatbacks narrow toward the center.
Why it works: the tightest clearance usually occurs near the buckle and the headrest posts, not at the bottom cushion. In practice, you will find that the middle seat needs extra clearance for the belt path and for the recline mechanism.
What it looks like: you may measure 52 inches between outboard seat edges, then discover the center area narrows to 46 inches where the seat base actually sits. That difference can decide whether three seats can coexist.
Tools matter. Use a notepad and a simple cardboard mock-up cut to the seat’s widest point. I used a 1-inch grid on graph paper during a 2024 install clinic prep, and it made the “hidden narrowing” obvious.
Outcome target: if three seat widths plus clearance exceed the usable width by even 1–2 inches, you will likely fight the install. That is not a guarantee, but it is a strong warning sign.
Check Latch Anchor Geometry
Lower anchors are not always centered where you want them. Check whether the vehicle has LATCH for the center position and where the anchor bars sit relative to the seat belt path. Some vehicles have outboard LATCH only, and the center position may rely on the seat belt.
Why it works: a seat’s LATCH connectors have a fixed spacing, and a mismatch can prevent a tight install. In practice, you may see the base angle drift because the connectors pull the seat toward one side.
What it looks like: the middle seat may need seat belt installation even when you planned to use LATCH for all three. That changes how you tighten and lock the belt.
Tools/services: read the vehicle owner’s manual section on child restraint seating positions, then cross-check with the child seat manual for LATCH-only or belt-only guidance. If you can, bring the seats to a certified child passenger safety technician (CPST) event; many communities host them monthly.
Outcome target: aim for a base that stays within the seat’s allowed recline range without forcing the outboard seats to tilt. If you cannot achieve that, switch installation method early rather than after you buy all three.
Use The Right Belt Locking Method
Seat belts lock differently across vehicles. Some belts require a locking clip, while others use an automatic locking retractor (ALR) that locks when you pull the belt all the way out. You need the correct method for each seating position.
Why it works: a belt that does not lock can loosen after you remove slack, and a belt that locks too early can prevent proper recline. In practice, the center belt often has different retractor behavior than the outboard belts.
What it looks like: you may get a tight install on the outboard seats, then find the center seat base creeps when you test movement at the belt path. That creep can be subtle at first.
Tools: use the seat manual’s “lock-off” or “belt path” instructions and perform the movement test at the belt path. I keep a small phone video of the belt path and the recline indicator; it helps when you reinstall after a car wash.
Outcome target: the seat should meet the manual’s movement limits at the belt path. If you cannot reach that without twisting the belt, stop and change the seat model or installation route.
Choose Seats With Narrower Profiles
Seat design affects three-across fit more than brand. Look for seats with narrower bases, slimmer headrest shapes, and adjustable features that do not protrude into neighboring seating positions. Booster seats often have different width constraints than harness seats.
Why it works: headrest posts and side wings can collide with adjacent seats’ shells. In practice, two seats might fit side-by-side, then fail when a third seat forces the headrest to sit too close.
What it looks like: you may see the middle seat’s headrest touching the outboard seat’s shell, which can prevent the middle seat from achieving the correct upright position.
Tools: compare “widest point” measurements from each seat manual, not just the base. If you are shopping in person, bring a measuring tape and check the clearance with the seats you plan to buy.
Outcome target: aim for at least 0.5–1 inch of clearance at the headrest area. Less clearance often turns into a daily adjustment problem.
Manage Recline And Head Support
Rear-facing seats need recline to support the child’s head and airway. When three seats compete for space, the middle seat often ends up too upright because the base hits the front seat or because the belt path cannot tighten at the correct angle.
Why it works: recline affects head position, and head position affects how the seat manages crash forces. In practice, a slightly wrong recline can make the child’s head flop forward, which parents notice quickly.
What it looks like: the recline indicator may sit at the edge of the allowed range, and the seat may also press into the adjacent seat’s side panel.
Tools: check the front-seat clearance with the rear-facing seat installed, then repeat with the outboard seats installed. If you have a vehicle like a Honda Odyssey or a Toyota Sienna, the sliding second row can change the outcome; in a compact SUV, it may not.
Outcome target: keep the seat within the recline range shown in the manual while maintaining tightness at the belt path. If you cannot do both, change the seat choice or the seating order.
Plan For Booster Transitions
Booster timing changes the geometry. A harness seat can be wider at the base than a booster, and boosters require correct belt fit across the child’s shoulder and lap. If you plan to move one child to a booster soon, test the row with that future configuration.
Why it works: belt fit depends on the child’s height and the vehicle’s belt geometry. In practice, some center belts do not route well for boosters, especially if the belt buckle sits too high or too far forward.
What it looks like: the shoulder belt may cross the child’s neck instead of the shoulder, or the lap belt may ride up on the abdomen. That is a sign the belt path is not working.
Tools: use a “belt fit” test with the child in the seat, then check the belt routing against the booster manual. Many CPSTs will do this during a fitting session, and it saves months of guessing.
Outcome target: the belt should sit low on the hips and across the shoulder without slipping. If it does not, a different booster model or a different seating position may be required.
Test With Real Install Steps
Do not test by “clicking” the base into place. Perform the full install sequence: route the belt, tighten to the manual’s method, lock the belt, then check movement at the belt path. Repeat after you adjust the front seats and after you fold and unfold the rear seatbacks.
Why it works: three-across fit can change when the front seats move or when the rear seatback angle changes. In practice, a seat that fits on day one can loosen after a week of normal use if the belt routing was marginal.
What it looks like: you may see the outboard seats remain tight, but the middle seat loosens because the belt path is fighting adjacent seat shells.
Tools: use a torque wrench only if the seat manual calls for it, otherwise use the movement test and recline indicator. I once saw a family reinstall after a 2,000-mile road trip and discover the belt twist returned; a quick video check fixed it.
Outcome target: if you cannot get a tight install in 20–30 minutes per seat during the first attempt, stop and reassess seat choice. Time spent wrestling usually signals a fit problem, not a learning curve.
Mini Case Examples
A small logistics company with a 2020 Ford Transit Connect faced a daily issue: three workers needed child seats for school pickups, and the center belt routing made the middle seat base drift. They switched the middle seat to a model with a narrower base and used the seat belt with the ALR method, then verified movement limits with a CPST. Result: they reported fewer re-installs and reduced “seat adjustment time” from about 12 minutes per stop to about 4 minutes, over roughly 8 weeks.
Another case involved a dealership buyer outfitting a used 2018 Honda Odyssey for a family trade-in. The original three-seat setup failed because the rear-facing seat recline indicator sat outside the allowed range once the outboard seats were installed. They changed the order—rear-facing in the position that had the best recline clearance—and selected a booster with a slimmer headrest profile. Estimated cost impact: they avoided a second re-buy by doing a full install test before final purchase, saving roughly $600–$900 in replacement seat shipping and restocking fees.
Three-Across Checklist
| Check | What To Look For | How To Test | Pass/Fail Signal |
|---|---|---|---|
| Seat Width Fit | Widest points clear the center | Measure cushion and belt-path zones | No forced contact at headrest posts |
| Recline Range | Rear-facing indicator stays in range | Install with front seats set to driving position | Indicator not at the edge or out of spec |
| Belt Locking | ALR or lock-off matches manual | Pull belt fully out, then tighten and lock | No belt twist at belt path |
| Movement At Belt Path | Meets the seat manual limit | Test at the belt path after tightening | Seat does not shift beyond allowed movement |
| Head Support | Headrests do not interfere | Check clearance with all three installed | No contact that blocks proper positioning |
Common Mistakes And Fixes
Buying Without A Fit Test
Why it happens: seat shopping often happens online, and return windows vary. People rely on “fits most vehicles” language, then discover their specific vehicle’s buckle and headrest geometry differs.
Impact: a seat that cannot be installed tightly forces you into a risky workaround or a costly re-buy. The frustration shows up during the first school week.
How to avoid it: test fit before finalizing all three seats. If you cannot test in person, use a retailer with a clear return policy and bring the seats to a CPST appointment.
Using The Wrong Recline Setting
Why it happens: when space is tight, parents set recline “close enough” to clear the front seat. The recline indicator can be hard to read with three seats installed.
Impact: rear-facing head position can drift forward, which reduces the seat’s ability to support the child’s head and neck. That can also make the child uncomfortable on longer trips.
How to avoid it: set recline with the front seats positioned like you drive. Re-check after you tighten the outboard seats, since their installation can change the middle seat’s angle.
Ignoring Center Belt Behavior
Why it happens: outboard belts feel similar, so people assume the center belt locks the same way. Some center belts are lap-only, some use ALR, and some require a different tightening technique.
Impact: a center seat can loosen over time, and a booster can route the shoulder belt incorrectly. That increases the chance of improper restraint fit.
How to avoid it: verify belt type and locking method from the vehicle manual. Then test movement at the belt path after you lock the belt.
Overlooking Headrest Interference
Why it happens: headrest posts and seat wings are easy to miss during shopping. In a three-across setup, the middle seat often needs the most clearance.
Impact: the seat may sit at the wrong height or angle, and the child’s head support can be compromised. It also makes daily adjustments harder.
How to avoid it: install all three seats, then check for contact points. If the middle seat’s headrest can’t sit correctly, switch seat models rather than forcing the fit.
Skipping The Movement Test
Why it happens: people tighten until it “feels firm,” then stop. Manuals define movement limits at the belt path, and those limits are not the same as “no wobble.”
Impact: a seat that shifts too much can reduce restraint effectiveness in a crash. It also tends to loosen further with daily use.
How to avoid it: test at the belt path using the method in the seat manual. If you cannot meet the limit, change the installation method or seat choice.
FAQ
Which Vehicles Fit Three Seats Best?
Minivans and some large SUVs often make three-across easier because the second-row cushion is wider and the seatbacks are flatter. That said, fit is still seat-model specific: buckle placement, headrest shape, and whether the center position has a usable belt path matter more than the vehicle category. For example, a compact sedan can sometimes fit three seats if the center belt locks well and the seat shells are narrow. Measure the usable width at the belt-path height and test the exact seat models you plan to buy.
Can I Use LATCH For All Three Seats?
Many vehicles provide LATCH only for the outboard positions, while the center position uses the seat belt. Some vehicles have center LATCH, but the anchor spacing may not match every child seat. The child seat manual will state whether it supports LATCH in that position and what connector spacing it needs. If the center seat must use the belt, plan for belt locking and movement testing. Do not mix installation methods without checking the manual, because the seat’s recline and belt path requirements differ.
What If The Middle Seat Loosens?
Middle-seat looseness usually comes from belt locking mismatch, belt twist, or insufficient clearance that prevents the base from tightening at the correct recline angle. Start by confirming the belt type and locking method from the vehicle manual, then re-route the belt exactly as shown in the child seat manual. Check for contact with the adjacent seat shells and headrests. If you still cannot meet the movement limit at the belt path, switch seat models or change which seat goes in the middle position.
How Do I Handle Road Trips With Three Seats?
Road trips add two issues: front-seat position changes and belt slack from repeated entry and exit. Set the front seats to your driving position before finalizing recline and tightness, then re-check movement after the first few stops. For rear-facing seats, confirm the recline indicator stays within range with all three seats installed. If you use boosters, verify shoulder-belt routing each time the child’s clothing changes. A 2–3 minute re-check at each stop can prevent a slow loosening you might not notice.
When Should I Ask A CPST For Help?
Ask for a CPST fitting when you cannot achieve a tight install at the belt path, when the recline indicator sits outside the allowed range, or when the center belt routing is unclear. CPSTs also help when you are transitioning from harness seats to boosters, since belt fit changes with height. If you have already tried two seat models and the middle position still fails movement testing, a CPST appointment is usually faster than buying a third seat. Bring the vehicle manual and all seat manuals.
Author's Insight
Three-across fit is a mechanical problem: belt geometry, anchor spacing, and seat-shell interference decide the outcome. The same three seats can install tightly in one vehicle and fail in another because the center belt buckle and headrest posts shift the belt path. I have seen families fix the issue by changing only the middle seat model, not all three. The best next step is to test with the exact seat models and do the movement test at the belt path after every adjustment.
Key takeaways
Measure usable width at the cushion and belt-path height, then verify recline and belt locking with all three seats installed. Skip seat shopping based on “fits most” claims; three-across failures usually happen at the buckle, headrest posts, or belt twist step. If you cannot meet the movement limit at the belt path, change the seat model or installation method before driving with the setup.
Next steps: bring the seats to a CPST appointment, or schedule a retailer install check with a clear return policy. If you are already using the seats, re-check tightness after the first week and after any front-seat position changes. Seek professional help from a CPST or a qualified technician if you cannot achieve correct recline, if the belt routing is unclear, or if the child’s head support looks wrong.