Charging Curves in Plain Terms
A charging curve shows how many kilowatts an EV can pull at a fast charger as the battery state of charge rises. The curve usually starts high, then tapers as the battery approaches full. That taper is not a “slow charger” problem; it’s battery protection and cell balancing working as designed.
Most DC fast charging sessions follow a pattern: peak power often occurs around 10–30% state of charge, then drops as you pass roughly 50–70%. For example, a 250 kW charger can still deliver far less than 250 kW to your car after the battery warms and fills. The car’s own maximum charging power and battery management decide the actual kW.
Vehicle type changes the curve. A 400-volt EV and an 800-volt EV can behave differently because of how they manage current and voltage during charging. Battery size also matters: a larger pack can reach a given percentage with less stress, but it may still taper hard near higher charge levels.
Real-world planning depends on energy, not just time. A typical road-trip stop might add 100–200 miles of range, which can mean 20–40 minutes of charging depending on the curve and starting charge. The U.S. Department of Energy’s Alternative Fuels Data Center tracks that many public DC fast chargers deliver less than their nameplate power due to sharing and limits, so the car’s taper stacks with site behavior.
Skip the “charge to 100%” habit. It adds time when the curve is already falling. You gain less range per minute after the taper begins.
Why Road Trippers Get Burned
People often plan by charger speed alone: “This station is 350 kW, so I’ll be done fast.” The charging curve breaks that assumption because the car may cap power at 150 kW, 200 kW, or less, then taper quickly. Another common mistake is arriving at a low battery percentage with a cold pack, which can delay peak power until the battery warms.
Consequences show up as missed schedules and higher costs. If you stop at 70% and the curve is already tapering, you may pay for a longer session than expected. Some networks price by time, others by kWh, and some add session fees; the curve affects both.
Real-world examples make the pattern obvious. A driver leaving home at 20% in winter might see 120 kW for the first 15 minutes, then drop to 60 kW by 45 minutes. Another driver arriving at 40% with a warm battery might see 180 kW early, then taper later. Same charger, different curve.
Skip the “one charger per leg” plan. It fails when the curve forces extra minutes. You need a buffer for taper and for station downtime, which happens more often than people assume.
Plan Stops Using Curves
Start with your car’s kW cap
What to do: find the vehicle’s maximum DC fast-charging power in the owner’s manual or spec sheet, then treat it as the ceiling. Why it works: the car will not exceed its limit even if the station advertises higher kW. What it looks like: an EV rated for 200 kW on paper may show 160–190 kW at arrival, then taper toward 80 kW as you climb. Tools: many cars show live charging power; a phone app can log session history, and a spreadsheet helps you compare stops. Outcome: you avoid planning around a charger’s nameplate instead of the car’s actual curve.
Example: a 2024 Hyundai Ioniq 5 (77.4 kWh usable battery) is commonly listed with up to 230 kW DC fast charging, but real sessions still taper well before 100%. A 2023 Tesla Model 3 Long Range can charge faster than many 150 kW stations early in the session, yet it still tapers as it approaches higher state of charge. Those differences matter when you plan a 30-minute stop versus a 45-minute stop.
Pick a target state of charge
What to do: choose a target like 60–75% for most legs, then charge higher only when the next station is uncertain. Why it works: the curve’s taper usually accelerates at higher percentages, so the last 10–20% costs more time per mile. What it looks like: charging from 20% to 60% often adds more range per minute than charging from 80% to 100%. Tools: your navigation can estimate arrival state of charge, and the car’s range estimate adjusts for speed and temperature. Outcome: fewer “late-session” minutes and less money spent on the slow part of the curve.
Skip the “top off to full” rule. It wastes minutes when kW drops sharply. You get diminishing miles per minute.
Warm the battery before peak
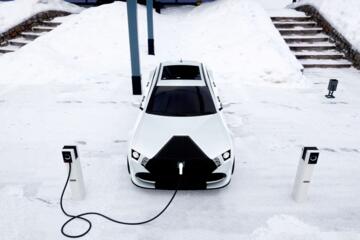
What to do: precondition the battery when the car supports it, especially in cold weather. Why it works: a cold pack can limit current, so you miss peak kW even at a high-power station. What it looks like: the car may show a lower initial kW, then ramp after a few minutes once the battery warms. Tools: many EVs have a “preconditioning” setting tied to navigation; in some models, it appears as a charging or climate option. Outcome: more time spent near the top of the curve.
Example: in winter, an EV that would normally peak at 150–200 kW might start at 60–100 kW until the pack reaches a usable temperature range. That delay can add 5–15 minutes depending on how cold it is and how far you drive before the charger. A small aside from the field: some cars show preconditioning status as a brief icon change, and it’s easy to miss if you glance once and move on.
Use live power, not ETA
What to do: watch the charging power (kW) and the projected time-to-target shown by the car, not just the station’s “available” speed. Why it works: the car’s taper and your battery temperature drive the session, and the station’s display often reflects charger capability, not your car’s curve. What it looks like: power might drop from 180 kW to 90 kW while the remaining time changes less than you expect. Tools: the car’s charging screen, plus a note of starting and ending percentages. Outcome: you can decide whether to leave at 65% or wait for 75% without guessing.
Skip the “charger app ETA” habit. It rarely matches the curve you’re actually on. The car’s own projection is usually closer.
Account for station limits and sharing
What to do: check whether the station has multiple stalls and whether it throttles when others charge. Why it works: shared power can reduce the maximum kW available to your car. What it looks like: you arrive expecting peak, but the car caps at a lower kW from the start. Tools: network status pages, PlugShare-style community reports, and the station’s own signage. Outcome: better expectations and fewer surprise delays.
Real-world fact: many public DC fast chargers advertise 150–350 kW, but actual delivered power often drops when multiple vehicles draw power. The Alternative Fuels Data Center lists many sites with different maximum outputs, and network operators commonly manage power dynamically. That means your curve planning should include a “worst-case” scenario.
Plan around energy, not miles
What to do: estimate how many kWh you need to reach the next charger, then translate that into a percentage target. Why it works: range estimates vary with speed, wind, and temperature, while kWh is the measurable quantity charging systems track. What it looks like: at 75 mph, you might need more energy than the car’s summer estimate. Tools: the car’s consumption display (Wh/mi or kWh/100 km), plus a quick calculation in a notes app. Outcome: fewer “arrived at 12%” moments.
Example: if your car averages 300 Wh/mi on a highway leg, a 150-mile gap consumes about 45 kWh. With a usable battery of 77 kWh, that might mean charging from roughly 25% to around 80% depending on losses and taper. Those are planning numbers, not guarantees, because HVAC use and elevation change consumption.
Choose the right charger type for the leg
What to do: match charger capability to your car’s curve and the leg length. Why it works: if your car only pulls 120–150 kW peak, a 350 kW station may not shorten your stop much beyond the first part of the curve. What it looks like: a 150 kW station that delivers stable power can beat a higher-rated site that shares power or throttles. Tools: station reviews, live availability checks, and your car’s charging logs. Outcome: more predictable stops.
Skip the “highest kW wins” assumption. It ignores how your car tapers. Sometimes the steadier 150 kW site gets you out sooner.
Case Studies with Numbers
Case 1: Fleet manager planning for repeat routes. A regional delivery company ran a 2-day loop with a 2023 Ford Mustang Mach-E (extended-range variant) and used DC fast charging at highway stops. The original plan charged to 90–100% at each stop, which often pushed sessions past 45 minutes because power tapered hard at higher percentages. They changed targets to 65–75% for intermediate stops and only charged to 85–90% when the next station was farther. Result: average charging time per stop dropped by about 12–18 minutes, and total kWh per day fell because they avoided the slow top-end of the curve. The company also reduced “late arrival” incidents by scheduling a 10-minute buffer instead of a 25-minute buffer.
Case 2: Family road trip with winter weather. A family used a 2022 Kia EV6 on a 300-mile trip in sub-freezing temperatures. They arrived at the first charger with a cold pack and skipped preconditioning, so peak power stayed low for longer than expected. After switching to navigation-based preconditioning and targeting 70% at the first stop, they saw higher early kW and a shorter overall session. Result: the first stop dropped from roughly 40 minutes to about 30–33 minutes, and the second stop became more predictable because the battery was already warm from the earlier leg. The family still charged less than 100% because the last portion of the curve delivered fewer miles per minute.
Skip the “winter is special” excuse. The curve changes, but planning still works. Preconditioning and target SOC do most of the work.
Charging Curve Checklist
| Planning step | What to check | Why it matters for the curve | Quick rule |
|---|---|---|---|
| Car limit | Max DC kW from manual/spec | Your car caps peak power | Treat station kW as a ceiling |
| Target SOC | 60–75% for most legs | Taper costs more time later | Charge higher only when needed |
| Battery temp | Preconditioning status | Cold packs limit current | Use navigation preconditioning |
| Station sharing | How many stalls share power | Peak kW may be reduced | Plan for lower-than-advertised kW |
| Energy estimate | Wh/mi or kWh/100 km | Speed and HVAC change consumption | Use your car’s consumption display |
| Session pricing | Time vs kWh vs fees | Taper affects cost differently | Avoid long top-end charges |
Common Mistakes and Fixes
Charging to 100% every stop
Why it happens: drivers want certainty and assume “more charge equals less hassle.” The curve punishes that choice because the last portion often delivers the lowest kW. Impact: longer sessions, higher costs, and more time spent waiting while power tapers. How to avoid it: target 60–75% for intermediate legs, then charge higher only when the next station is far or unreliable. If you need 90%+ for a specific gap, plan that stop as the “long one” and keep the others shorter.
Arriving with a cold battery
Why it happens: navigation sometimes routes you without preconditioning, and many drivers skip the extra setting. Impact: peak kW arrives late, so the first 10–20 minutes deliver less energy than expected. How to avoid it: precondition using the car’s navigation feature when available, and leave a few minutes earlier in winter. If you see charging power stuck low, wait for the battery to warm before judging the station.
Trusting the charger’s advertised kW
Why it happens: station signage and apps show “up to 350 kW,” which sounds like a promise. Impact: your car may cap peak power far below that, and sharing can reduce it further. How to avoid it: check your vehicle’s max DC kW and watch live kW on the charging screen. If your car peaks at 150 kW, a 350 kW station rarely cuts your stop in half.
Ignoring session pricing
Why it happens: drivers focus on time and forget that some networks charge by the minute. Impact: taper-heavy sessions cost more than expected, especially when you wait for 90–100%. How to avoid it: confirm pricing mode in the app before you start, then decide your target SOC based on cost per kWh or cost per minute. If pricing is time-based, leaving at 70% often beats waiting for 85%.
Skipping a backup charger plan
Why it happens: route planning sometimes assumes every station works. Impact: a single out-of-service charger can turn a 30-minute stop into a 90-minute detour. How to avoid it: pick a primary charger and a backup within 10–30 miles, then set navigation to the backup as well. This matters more on rural corridors where station density is lower.
FAQ
What causes charging power to taper?
Charging power tapers because the battery management system limits current and voltage as the pack fills. Near higher state of charge, cells become more sensitive to heat and lithium plating risk, so the car reduces power to protect longevity. Battery temperature also affects the curve: a warm pack can hold higher kW longer, while a cold pack may limit current until it warms. Even with a 250 kW station, the car’s own limits and thermal strategy control the taper, so the station’s nameplate rarely matches your live kW.
How do I estimate my road-trip charge time?
Use your car’s live charging power and its projected time-to-target, then plan around a target SOC rather than a fixed time. Start by noting your typical Wh/mi on the highway at your usual speed, then estimate how many kWh you need for the next leg. Convert that into a SOC target using your battery’s usable capacity and your car’s efficiency losses. In practice, many drivers see the biggest time savings by charging to 60–75% on intermediate legs and reserving higher SOC for the last leg or when the next station is uncertain.
Does an 800-volt EV charge differently?
Many 800-volt designs can reach higher peak power and may hold higher kW longer, but taper still happens. The curve depends on the specific battery chemistry, thermal system, and the car’s maximum DC fast-charging power. Some 800-volt vehicles show strong early charging, then drop quickly after mid-range SOC; others taper more gradually. The practical takeaway is to plan using the vehicle’s live kW behavior and your target SOC, not the marketing term “800-volt.”
Is it better to charge at 50% or 80%?
Charging at 50% often delivers more range per minute because the curve is usually higher in the mid-SOC region. Charging at 80% tends to be slower because the taper is stronger as the pack fills. If your next leg is short and you can reach the next charger comfortably, stopping around 60–70% usually reduces total time. If you must reach a distant station, charging at 80% can be the safer choice, but it should be treated as a longer stop with higher cost per mile.
Will frequent fast charging hurt battery life?
Fast charging increases heat and stress compared with slower charging, but modern EVs manage this with thermal control and charging limits. Battery longevity depends on how often you fast charge, how hot or cold the battery is when you start, and how frequently you charge to very high SOC. Avoiding repeated 90–100% charging and using preconditioning in cold weather can reduce stress. For long-term ownership, many owners also mix in slower charging when time allows, especially overnight, to keep the battery in a more moderate operating window.
Author's Insight
A charging curve is the EV’s version of a “fuel gauge reality check.” The station can be capable of 250 kW, but the car often limits peak power and then tapers to protect the pack. The most consistent road-trip improvement comes from choosing a SOC target that sits before the steep taper, then using preconditioning so you reach peak earlier. I’ve also noticed that navigation routing and app pricing rules change the outcome more than people expect, so logging one or two trips helps you calibrate your own expectations.
Key Takeaways
Plan road trips around the curve, not the charger’s maximum kW. Choose a target SOC like 60–75% for intermediate legs, precondition in cold weather, and watch live kW to decide when to leave. Expect taper to make the last 10–20% slower and often more expensive, especially on time-based pricing. If you see repeated underperformance, check station sharing, battery temperature, and your vehicle’s DC fast-charging limit in the manual.
Next step: pick one route, run a test stop, and record starting SOC, ending SOC, and average kW for that session. Use those numbers to adjust future targets. If you notice charging errors, repeated thermal warnings, or abnormal battery behavior, follow the vehicle’s diagnostic guidance and contact a qualified service center rather than guessing.